Would love to do runs of the credits warp cat, can anyone make a vid to briefly explain what to do?
The game is maximally optimised now, I think we should have ms available for top times as it won't be long before WRs are not improvable by more than a second a time.
I looked at previous runs and determined that the board has times based on framecount/60, so if you want your run accurately timed just submit at 60fps. Where a run has no framecounter visible I will retime based on VODs and find the correct time based on a whole-frame divisor.
We can also just call it Camsliding.
Edited to replace vid with one that has a consistent setup and visible RAM.
When you move the camera left for just 5 frames and then stop pressing, it still scrolls but you don't move backwards. Wait until you see the enclave shadow at the top of the platform then move right again, and you trick the game into slowing down the cycle so you can pass.
Hi, haven't run SoM before but saw in a run that there's tricks involved for magic%, could someone explain them and how they work/whether they can go wrong?
Following a runner request I added difficulty as a variable so we can now track Easy and Hard runs! In order to promote accessibility I also decided it would make sense to mod the ruleset for Arcade Easy, to allow runners to put Rapid Fire ON since that would primarily be a less serious category. Allowing RF still requires skill from a player to avoid lag from constant bullets. What are runners' thoughts for an analogous access to Original Mode? We could track RF ON without much fuss. I would also say we could get fun mileage in each mode from a custom category, but we need to flesh that out for strategy being variable and interesting - something like -Collect the highest number of medals -Collect all Ms (limit usage) -100% upgrades -Require each of the four main characters to be used in 2 levels each etc or combinations. I appreciate we barely have a community but a really interesting category would be nice - all thoughts welcome.
Just a sticky post to clarify that runs must start from reset/power-on. A run was submitted recently which started from a savestate of the title screen by mistake: no advantage was gained so it was verified, but future runs must reset or power on else they will be rejected. Apologies for the omission of this basic rule until now!
JKL discovered that in this version of the game, global timers for moving items such as Drawbridge in Beginner, and Pistons in Aerial, are not reset between game overs. It is permitted to take advantage of this in your runs and we will post further concrete information on this when it is discovered.
For the Drawbridge, get to it and keep it on screen until the time runs out. Then on your next (timed) run it should automatically be down.
Pistons are on a 27 frame cycle. You may need to tinker individually with preferred methods to manipulate this to your advantage.
Hammer patterns are reset to 0 every time the level starts and advance 104 frames from the beginning, excluding lag.
I will be make a guide/tutorial to the game to encourage new runners in the next few days. The game looks complex at first but isn't that bad and is quite short.
(Record kept here since I cannot now find Activity Log) I edited the rule defining timing start which was inaccurate and ambiguous, to reflect gain of control. petaQ 27/10/21
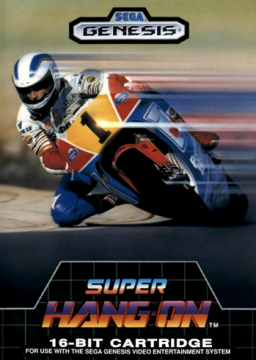
I was requested by SRC to ask for the addition of GBC Marbles manually through you guys in the series. The initial run is linked here:
We are in the process of retiming all runs past and present for leaderboard consistency and to include milliseconds owing to the shortness of the game and tightness of the board. Please bear with us while we do this as there are some complications due to different video frame rates. When you submit runs in future please show frame counter if using an emulator. If you have any questions or issues with retiming just let us know, since we want this to be transparent and a one-time edit so that everything is clear for future runs.
Sacrieon and I are both grinding for WR level now, and I feel it's an appropriate time to ask that milliseconds be added to times - the top runs seem to be second-unique anyways but adding in the MS will make it easier for new runners to track progress.
$310 for the next person to break below 3'11, time limit of 310 days. This bounty will end Tuesday 3 May 2022 at 12.30pm BST. Should nobody achieve it in this time, it will roll over to something else in future. From experience, 3'10- is a whole other level to 3'11 so this one has to be properly earned. I'm currently grinding for 3'10 or 3'09 but it won't invalidate the bounty if I get there.
$190 total, for the fastest three new runs, time limit until 1/1/2022 at 12.30pm GMT:
$100 for 1st, $60 for 2nd, $30 for third.
(Edited) This bounty excludes the current top 4* players on the Africa course since the other 2 are already at 3'12. JkL has an old PB well below 3'16 and is grinding the top prize. Any other player is eligible.
Rules:
Play using emulator at 60fps. Console runs a tad slower, so I want to somewhat even out the fairness, though I will still accept and encourage all new runs from consoles outside of bounty. Ideally use Bizhawk or RetroArch. Fusion goes nuts on SHOG, you would be seriously disadvantaging yourself with that. Please use a physical 3/6-button controller if you can. Feel free to stream your attempts, I would love to be around to watch and support you, our little game needs more love stream-wise.
!Other emulators may not be reliably accurate. Please research and ask if in doubt, because if an emulator is significantly slow your run may not count for the bounty.
You can use Rev00 or Rev01. Almost all top runs prefer Rev00 - it has more responsive steering, and an uncapped frame rate, leading to speedups/slowdowns in the course of play - this can be particularly helpful in trafficked sections. By contrast Rev01 has a smoother framerate, but the steering isn't tight so it's better suited for beginning runners.
Unsure which version you have? https://tcrf.net/Super_Hang-On_(Genesis) will explain more.
Use the standard bike, do not use any passwords, savestates, or time hacks. Do your runs on the default normal time and difficulty. All runs will be verified by me then cross-verified, and we have experience of rooting out cheats.
Good luck to all!
I was looking at AmenAnthem's no OOB Easy WR just now and I noticed it actually floor clips through the destructible block after the sub-boss in Nighttime 2. ETA: the run was performed after the date of the first OOB run and verified, but should still be discussed here
I have some new routing tech in the game anyways, so my post is in no way an attempt to foul AmenAnthem's run or give myself an advantage.
(Edited) The question then should be asked: is this/should it be permissible in no OOB category runs? It's important because it would also be usable on the second breakable floors at the top right end of Nighttime 2.
I feel like it shouldn't be permissible going forward in no OOB runs but part of me doesn't want to see a WR run junked because of such a tiny thing.
I recommend new players to spend time practising with £400 and £800 strategies because this will give you more experience of hairy trips west in Level 5 and 7 increasing your skill faster and sharpening your decision making skills.
If you want to use a £1200 strategy you will need to understand the purchase rules to avoid horrible lumpy runs, which requires experience, AND you will need to be absolutely on point with your money walkovers. It is VERY easy to lose time attempting a £1200 strategy - if you end up needing money in the banks in 5 or 6 you are generally screwed unless it's a snail conversion or you're harvesting insurance for 7.
If you want to use a £400 strategy, get your money from: -West Bank 1, and the two Alien Men who come across the bottom path after that returning to the shop, and other enemies you find in L1 -Opportune walkover points in L2, exploiting the 4 snails on the bridge on the return to shop -Opportune walkover points in L3.
For an £800 strategy (best fit overall), add in the East Bank in L2, and more enemies in L2 and 3. The general rule is any cluster of 2+ enemies is good to grub money unless they require many hits (ie a group of miners in 3 is terrible). 1 moneybag, as a rule, should take <1.0 seconds to grab out of your way to be worthwhile. If you struggle, use West Bank in L3.
In Level 3, buy the Red Miner, IF: -It comes up as letter 2, 3, or 4 (only if you have NOT exited the shop first) -You haven't already had Red Batman (since that's the goal object) -You have not had Red Rat in P1, unless you then get Black Rat
Obeying the above, buy Red Miner, after White Miner.
In L4, if you get the Red Pussycat west of the level, jump in the shop straight away and buy it. You can go west for the pigeon, not east: to the 3-pronged bridge just after where Red Toad shows up.
If you get the Mosquito in L4 you don't need to wait for it to appear: just get the Superscroll straight away. Similarly for Black Lynx, scroll the screen so that the 2 columns right of the shop, before the water, appear, and it will Superscroll. You can't do this with Red Lynx or Red Toad. You can spawn the Green Toad on-screen then run back and Superscroll without a kill, generally.
In Level 5, if your first enemy is any snail, go right. If he is there and your 2nd enemy is a snail, buy it and the antelope which follows (it's always the far antelope). You will then always get the closer, right-side Blue Athlete.
Never EVER buy the worm unless it's your last letter, or you want to try a 50/50 gamble from p5 that you will score a good p6 animal when behind your pb. Worm slots transfer to the west snail, one of the slowest enemies in the whole game, and there are plenty of places in the WOF where worm follows worm. So if you absolutely must buy a worm, go out of shop first and manipulate WOF a bit.
If your first snail in L5 comes up in p4 or later it is reasonable to gamble on buying it without travel. Never in p1-3.
In L6, the pigeon who haunts the mausoleum is not on a fixed cycle. He can spawn early, in which case jump over the top of the bank, normal position, in which case go BACK and around the bank, DO NOT TRY TO KILL IT because you can fall in a hole, or late. If it's late close, you must get used to fireducking after jumping into the centre of the mausoleum, because the Blue Athlete can often line up badly.
In Level 7, the normal ratio of ghosts appearing west versus the one you can spawn by moving east is 6:1, but you only lose 2-3 seconds for an attempt so it's often worth it. Toad ratios are 1:1 and the west toad will sometimes give a draw delay.
Here is the spreadsheet detailing the RNG distribution of enemies.
https://docs.google.com/spreadsheets/d/18JOu_LbxQfVieQXBKDWUaRnGwGVtIoTWaXB6AFGY7ys/edit?usp=sharing
For every enemy in the list, when it is drawn from the pool its instances in WOF are replaced by the one above it (or going back around from the first to the last). This makes distributions very uneven.
Here are some general tips and rules about purchase logic: -A £1200 strategy seems to be best. It requires collecting £800+ before the start of Level 3, using the banks on the way in 1, 2, 3, and the junk in 5. This strategy enables double buys in L3 with favourable patterns leaning towards the red enemies, saving more time. It also gives you backups for buying 2 enemies in L5 or even insurance for 7. -Your most likely first enemy in L3 is Green Batman. NEVER buy this outright. If you want to spin the wheel, go in the bank first, and kill the batman who may spawn in the cave above the invulnerability first, then buy. Following this, if you get Red Miner, buy it, that should really tilt you towards red enemies. -If a Black Rat comes up first, and you can reliably get in the shop quick enough to stop 4b95 within 2-4 slots of movement, do it and buy it. 25% of the time you get Green Batman and have a time loss. 9.4% of the time you get Red Batman giving good implied odds. 25% you get Red Rat which is highly favourable. 28.13% you get the Red Miner, also buy that then for a guaranteed Red Batman. (For Red Batman you need to load him by scrolling the screen sufficiently to the left, this takes practice.)
If the Grey Egg has already been collected, and you get Black Rat, you can stay in the shop and buy it, increasing Red chances.
Otherwise, generally, you want to collect Green Batman and hope for favourable deviations.
In Level 5, never EVER buy the worm. It leads to some really janky sequences. If you get a snail on your first few enemies, go right and see if he's there. If he's there, don't go in the bank. If he isn't there, go in for an extra £400, back, and buy. Always try to wait until the snail close/far situation resolves before buying here. If you know the last enemy is a far away one, feel free to buy it. For antelope you typically have to go outside and check he isn't local first, there's no easy way to tell except from very specific enemy patterns that you will begin to recognise.
In Level 7, if you have spare money, if your first enemy is the King Cabbage, always buy him. Always buy Hook, and if after Hook you get Quasimodo, buy him too. Do not buy Quasimodo then Hook, you screw up RNG that way. In L7 your odds are already stacked in favour of a nice ghost or toad, it's up to you whether to gamble on it being the closest one for a few seconds time save/loss.
I have looked into the RAM for the game and begun to understand the events that cause the pseudo RNG for Clock Tower bolts. It is not random. Address $0063 is affected by movement of: The boss in forest Active moves of the mini-clowns, and movement of the boss in toy factory Choco devil hitting the wall/breaking up Breaking a walking A or the jumps of a bouncing A, or appearances/moves of the book in library Activation of bolts in the clock tower.
Activation means that a bolt is allowed to move off the stack: if you are quick and kill a bolt in place it will not advance the rng counter.
The easiest way to think of this is to imagine a series of branching paths which lead to a fixed point in a sequence in clock tower. Once you enter that level you can no longer edit what path you are on, but you can burn as many bolts as you need to get an H not an L on the right one.
Just as interestingly, it seems that inverting level order will put you on a different path even if your actions in the levels are the same both times. If you have done many runs before you will have noticed sometimes you had the same pattern in clock bolts because of this. So for example if you are very consistent at Levels 1-3 but struggle with Book boss, going clock first may help your RNG.
It may take some time but I plan to research into specific ways this can be manipulated so that there is a firm strategy available for fixing this rng. Meanwhile feel free to try your own methods in practice - you can try to reliably perform each rng action the same each run, and work out where you are in a pattern.
One more thing that may be of semi-importance here: I noticed a now obsolete TAS by Tee-N-Tee uses Castle of Illusion v1.1 rom stating: "In this version, you'll get the deciding movement of the second topmost screw nut "naturally" (meaning you don't have to spawn and respawn this enemy in a whacky way), which more than makes up for the 30 lost frames in the previous level."
Unsure whether the official releases rule covers this discrepancy but perhaps it should be looked at going forward just for consistency's sake since we can now begin to manip the rng ourselves.
Yo, fumbled around with this on PAL and VHS back in 2005 for ever so short a time to maintain sanity. Would love to pick it up, so let me know if any guides were ever made or if I should add anyone on discord.
