
This guide provides a detailed explanation of the strategies used by speedrunners for the Tower any% category, as of 1/7/2025.
The Tower
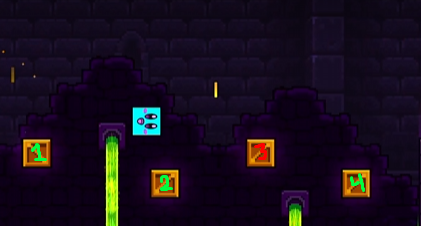
The first obstacles that are of concern are these 4 boxes after the first checkpoint. The best way to get past these is to jump off of the first box, jump off of the second box (this was made easier as of update 2.201 with the introduction of coyote time), and landing on the fourth box, thereby skipping the third.
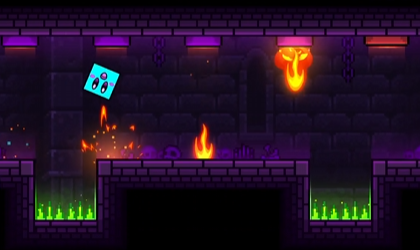
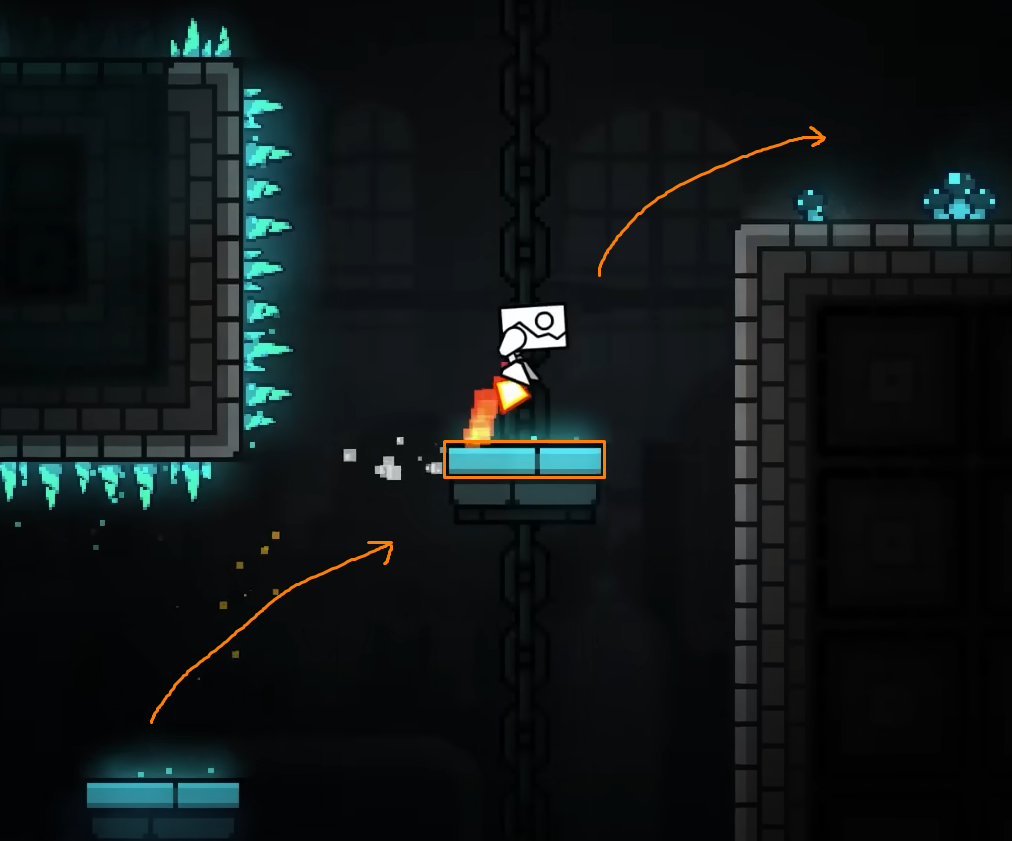
Directly after the 4 boxes are a set of 5 fireball launchers that shoot towards the floor. It's impossible to run in without any concrete strategy, so what I personally do is jump shortly after the 1st as I'm about to land, the 3rd fireball has already hit the ground.
The first time you will have to stop holding right is here, at the climb, right after the fireball section. After jumping off of the fireball's platform, land at the first platform directly above the skeleton. Immediately turn around and jump into the pink orb, and quickly jump off of it twice. This will give you enough height to land onto the first platform on the left side, skipping the second platform on the right. From there, go forward and jump off of the same platform you just landed on and jump off of the yellow orb.

If you've done all of this correctly so far, you should be arriving at these saws as soon as the first one stops towards you.

Wait a moment after hitting the second checkpoint, then start moving towards the rotating platforms.

Jump early off of this platform from the second set of rotating platforms to land at the front of this platform from the third set.

Jump off of the spot you just landed on to land on the rear edge of the same platform, then make the jump to the edge of the first platform of the wall. Jump to the second platform, then move towards the right, making sure that you don't bump yourself on the corner of the edge, as it will cause you to lose momentum.

After holding right for a few seconds, you should hit the button under 29 seconds.
The key to a good door is to immediately go left when you are able, then turn around when you touch the 3rd indent to the left of the carpet. Then, jump when you touch the 2nd indent to the right of the torch. You will be able to squeeze in between, the perfect setup.

From there, hold right until you press the final button, ending the Tower split.
The Sewers
Hold right as soon as you spawn in, and follow this sequence of jumps.

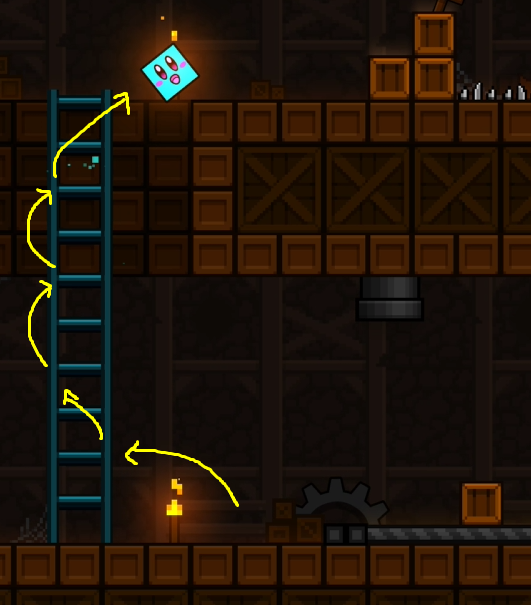
Stay to the left as you climb the ladder.

You do not need to do any special maneuvers or stops during this part, but after jumping to the platform marked in red on the left, you will most likely have to wait as you watch the wooden platform retract into the wall.
Note: It is possible to "zero-cycle" this portion of the run, however, it is essentially a 240fps frame-perfect on updates that are not 2.201.

As soon as you are able to, jump onto then off the retracting wooden platform, onto the ledge, then the box, then the platform with the torch, skipping the checkpoint on the left.

Fall off of the ledge slightly, then jump mid-air using coyote time, and you will just barely land on this moving platform.

As you head towards these platforms, make sure you go UNDER the pads to minimize time spent in the air.

Enter the door to start the tower phase.

The tower phase is mostly an autoscroller, and is impossible to speed up. Do your best to survive.
During the end of the tower phase, the ground spikes will move towards the middle, but ebb closer to the edges. Use this to your advantage and jump over the spikes, and be careful not to do it too early or you risk losing momentum to the wall that hasn't disappeared yet.

Hold right and go through the final doorway, ending the Sewers split.
The Cellar
Jump off of the 2nd step of this staircase.

Ride the platform that spawns when you get here. When the left side of the platform touches the 2nd node, jump towards the 2nd platform on the left, then turn around and move forward.

Jump onto the first platform on the right, then turn around and jump, skipping the 2nd platform. Ensure you hit the hidden trigger on the 2nd platform as soon as possible.
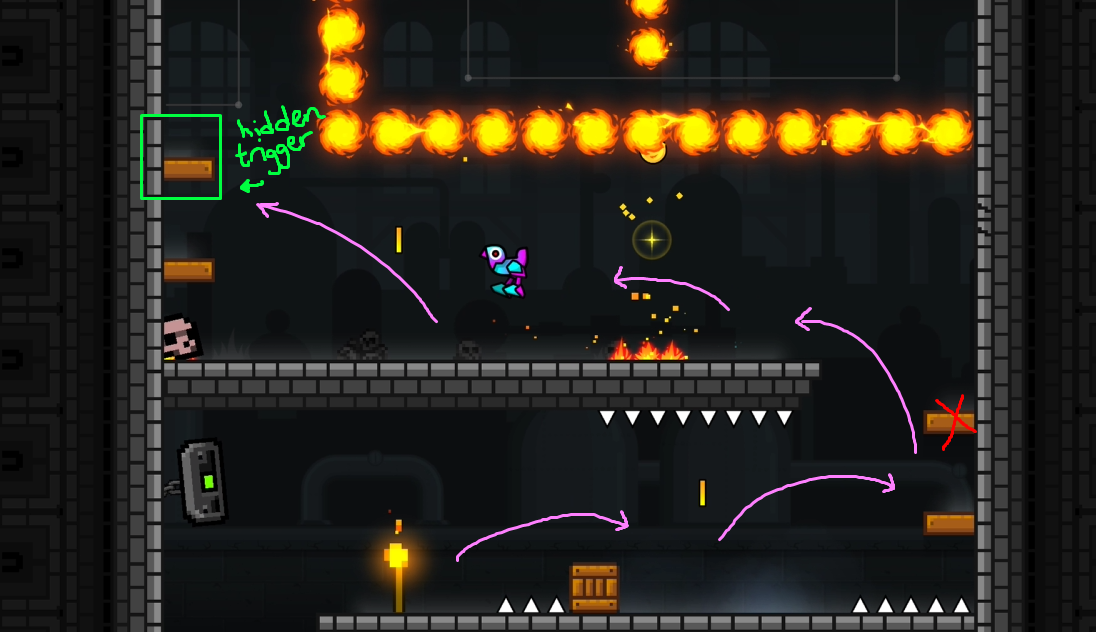
It is possible to now jump onto this section when your robot is at this point. Make note of the moving spikes' positions and sequence and act accordingly. Jump onto the first platform and land as quickly as possible, minimizing air time.

Remember that you are racing against the clock. These spiked platforms can and will mess you up, so remember to minimize your airtime by landing on the wooden platforms as soon as possible.

Here you have a choice. You can take the red route, landing on the wooden platform going to the right, which is safer. Or, you could take the more dangerous blue route, landing on the edge of the spiked platform going to the left, which is a lot riskier, but saves 0.5 seconds.

Whichever way you choose, you will still need to jump to the bridge platform as quickly as possible, but do not forget to activate this invisible trigger, which causes the GLaDOS-looking guy to freak out. It is possible to skip this trigger, causing seconds of time loss.

Use the cutscene as a time to relax, high-five yourself, whatever, but be at the edge of the left wall so you are ready to pick up the bomb.

When the bomb bounces a second time, hold right and click to instantly pick it up while moving.

Then, deliver the package to Rattledash and back away.

Jump as you're moving towards the explosion to dodge the force that blasts you away from it.
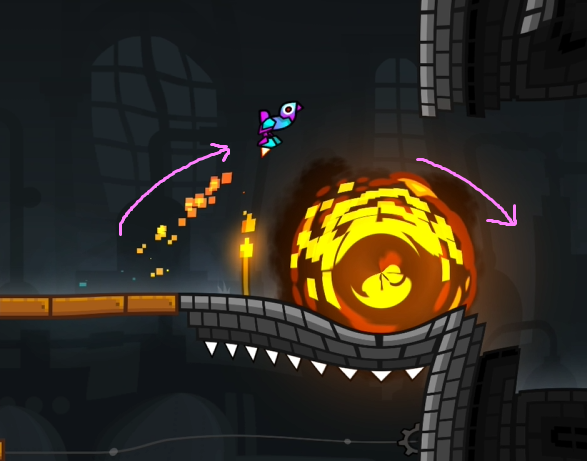
This bat wakes up when you cross a certain height, so the best course of action is to jump high during this jump with the coin, and jump onto these platforms quickly, making sure you don't die to the bat as he flies offscreen to the left.

You can run past the first set of stalactites with no issue, but when you get to the second set, back away for a moment and jump past them. After that, you can get past the third set like the first.

There are two routes for the upcoming section.
Normal route
Jump onto the platform with the chain and wait until you have clearance to drop down to the floating platforms below.

Jump onto the platform marked in pink and jump onto the ledge as soon as possible.

Jcak Cycle
Note: Pictures for this section are taken from sinc0s' 7:00.62 WR.
Jump past the the platform held up by chains, and fall through and in between the platform and spikes, landing on the platform marked in orange below.

Jump onto the platform marked in orange, and onto the ledge.
This route is extremely difficult, and as of 1/13/2024, only 1 person has successfully been able to implement it into a full run.
Continue right and enter the cave, ending the Cellar split.
The Secret Hollow
Make a full jump where the floor and slope meet, marked in yellow. Make another jump immediately after, and course-correct if needed.

Jump over the fireball, and land on the third rung of the ladder.

Continue this pattern of jumping on each 3rd rung, and make your way towards the cave entrance.

Do not jump into this transition to save 0.5 seconds.

Make your way up this elevator section, and aim to hit the last jump earlier than the rest.

Hold down instead of spamming to break out of the cage, and try to build momentum inside by going to the left side of the cage. Hold right between the 5th and 6th jump so that you exit the cage with as much speed as possible.

Turn around as soon as you press this button by the door.

Jump when the box bounces for a good lineup to land on it as soon as possible.

Build your momentum while climbing ladders.


Hold jump and minimize the treadmill's slowdown by spending as little time on the ground, and as much time in the air as possible.

Drop off of the last box and time your jump into the elevator. If you're fast enough, you should be able to make the cycle.

Jump onto the next platform and continue jumping, even if you hit yourself on a box.
As you fall, start veering to the right near the end to build up some speed, opening the door quicker.

Fast Route: Pac-Man Cycle
This route is significantly harder than the safer one, but it saves a second. The biggest concern is fitting in between the pink Pac-Man and the wall in the beginning.

Slow Route:
If you are unable to pull off the Pac-Man cycle, follow this route to collect the keys. Be careful when the pink and yellow monsters get near each other like pictured.

Then, follow this route. Be careful to not bump into the corner marked with the X, or else you will be too late to collect the 2nd key and die to the rolling spiked ball.

Go to the right side of the room to activate this trigger as soon as possible.

The Cursed Thorn (2.206+)
During the first phase, Thorn's movement is erratic, so the best and most consistent time to hit him is when he is turning around.

However, during the second green fireball, he will be at a close enough range that shooting him usually results in a successful hit.

Because the second phase of Thorn is on a timer, we can use this to our advantage and get more hits in than usual. We know that he shoots a green fireball after 3 normal ones, so when he shoots a green one, wait until he shoots his 3 normal fireballs, and go for the hit. These shots will almost always hit because he is more stationary during the second phase. And there will be another green fireball waiting, so we continue this process.
Near the end of the second phase, he will shoot his 5th green fireball. If you leave it alone for a while, Thorn will enter his 3rd phase. It's a short window, but if you hit him with the fireball, it will send Thorn into his 4th phase because he has been dealt enough damage. This strat is known as the "phase skip".

The fourth phase is RNG heavy, and ultimately decide the fate of your run.
The fourth phase introduces a new attack: the slam, and the laser that should've been introduced in the third phase that we skipped. It is scary at first, but to a runner, it is more of a nuisance because it prohibits Thorn from firing at all. In an ideal world, Thorn would only slam the ground twice during this phase. But since RNG is involved, this portion of the fight kills a lot of PBs.
Employ the use of the first phase's strategy of hitting Thorn while he's stationary (if you're really good, you can try to hit him while he's going for a slam). In only 3 hits, he's down, and the fight is over.
As Thorn dies and falls towards the ground, an invisible path that is supposed to be the bridge will spawn. We can jump onto this path before the animation of the bridge appearing starts, saving a few seconds.
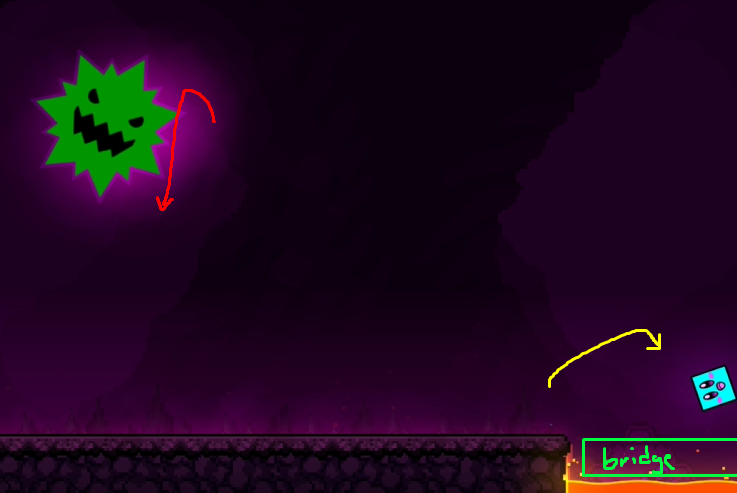
Hold right, and go through the door to finish the run.
I hope this guide was helpful to you, and good luck with your runs!
-zyngo
This March, join me as I speedrun 1-22 Any% in Frost Fatales 2025! The run will be live on March 10th, 2025 at 7:44 PM EST and has a donation incentive for the Tower! Feel free to join our Discord server for updates and reminders for the event!