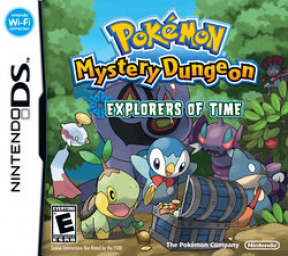
Munchlax/Totodile Any% No WM
Dungeon FAQ by OgreGunner: https://gamefaqs.gamespot.com/ds/938930-pokemon-mystery-dungeon-explorers-of-darkness/faqs/57222 AND https://gamefaqs.gamespot.com/ds/955859-pokemon-mystery-dungeon-explorers-of-sky/faqs/58190
Floor Layouts (mostly quoting the document above): (horizontal x vertical) Small: Small floor (2x3), takes around 1/3 of the map Small-Medium: Fairly small (4x3), takes around half of the map Medium-Large: Large (6x4), can take most of the map
Outer Square: 8 rooms in the middle of the floor, surrounded by a long hallway on the outside
Crossroads: 3 rooms at the top & bottom of floor and 2 rooms at the left and right side of the floor, all connected together by hallways in the middle
Line: 1 horizontal row of about 5 rooms
Beetle: A giant room in the middle that connects to a vertical row of 3 rooms on both sides (it is very likely the stairs spawn in the middle so rush there as soon as possible!)
-
Munchlax/Totodile is probably the optimal pairing for this speedrun. In comparison to Meowth, Munchlax has more accuracy and very short animations on his moves. However, this Team can't link early in the game and therefore needs to find an early Power Band, which the Meowth route does not struggle with. However, Power Bands are very common in Time
-
Also in case it is not clear yet, play Time, don't ever touch Darkness in context of a speedrun
-
Keep in mind that this is an intermediate route and it expects you to know how the run roughly works. If you are doing your first runs, I would recommend following Cheez's Guide: https://docs.google.com/document/d/1sSWt_d1V3NtOgnhr2njtxe2J79_hLOEbNE3JlxI5rxA/edit
Useful Moves: Munchlax: Tackle (lvl 1), Lick (lvl 12), Screech (lvl 20) Totodile: Scratch (lvl 1), Leer (lvl 1), Water Gun (lvl 6), Bite (lvl 13)
- You do not need anything else
Links: (Do not link before Expedition) After Expedition: Munchlax: Tackle + Lick; Totodile: Water Gun + Bite + Scratch Before Brine Cave: Munchlax: Screech + Tackle + Lick (optional but recommended Link)
Required Items: 5 Escape Orbs (1 before Apple Woods, 2 before Amp Plains, 2 after Crystal Crossing) 1-2 Sleep Seeds for Groudon, 1 Stun Seed for Luxray, 1 Stun & Sleep Seed for Spiritomb 1 Stun Seed for Dusknoir 1 Quick, Stun, Blast and Sleep Seed + ~10 or more Geo Pebbles for Dialga = 5 Escape Orbs, 4 Stun Seed, 3-4 Sleep Seeds, 1 Quick Seed, 1 Blast Seed, 10 Geo Pebbles
Also pick up as many Pure Seeds (spawns in most dungeons after Expedition), Foe-Hold, Spurn and Petrify Orbs as possible
- If you come from Explorers of Sky, you should keep in mind that in this game you have to equip your Bands everytime you enter a dungeon. It may be hard to get used to but it is very important not to forget to equip them
Quiz manip to be added soon
Beach Cave 5F: Small
- Set Tackle on Munchlax and Scratch on Totodile
- Change Settings (Movement Speed: Fast and Far-off Pals: Self)
- Topscreen Setting is preference, press right once for Team Stats
- Very useful to collect a Blast Seed for Drowzee later
Zubat+Koffing:
-
Dash Right, Down, DownLeft and Tackle Zubat
-
Free Special Band! Very useful for Mt. Bristle later!
Drenched Bluff F7: F1-F2: Small F3-5 Small Medium #2 F6: Small-Medium #1
-
Be careful when Totodile learns Water Gun, since Storm Drain is active in this dungeon. Disable it once he gets into fights
-
Guarenteed Big Apple in F3
-
Pick up all Pebbles you find in your way, pick them up with your partner so you do not get the very long tutorial text (or if that does not work, swapping it with an item in your bag also does not trigger the tutorial text)
-
Once you gain control, check Purple Kecleon First. Only sell Iron and your Aura Band. Look for Escape Orbs or any other useful MH Orbs (Spurn, Foe-Hold, Petrify)
-
After the Cutscene check Green Kecleon for a Reviver Seed, and if you have money left over, possible items for deliver missions (for example Cheri Berry, Rawst Berry and Pecha Berry)
Mt. Bristle 10F: Small: F1,F8 Small-Medium: F2-5, F7,F9 Medium-Large: F6
- Equip the Special Band to Totodile immediately, and only enable Water Gun (disable Scratch on Slot 1)
- Drink Protein and give Totodile the Calcium
- Totodile should be able to 0HKO everything with Water Gun
- Once Totodile learns Rage (Slot 4), disable it
- Guarenteed Big Apple in F5
- Escape Orbs start spawning from now on
- You want to check all Orbs throughout this run!
Drowzee:
- Eat as many Blast Seeds as you have, let Totodile deal a lot of dmg with Water Gun
- (spam Tackle once you run out of Blast Seeds)
- Fight should be pretty free most of the time
Mission Day #1 (3 Missions):
-
Check the Left Board for missions, it should be quite common to get 3 Beach Cave missions on it. Be prepared to have the item on hand if it says "Deliver [item]"
-
If there are only 2 Beach Cave Missions on the Left Board, it is very likely there is one on the Outlaw Board
-
In that case, it is worth accepting it over a Drenched Bluff mission unless you do not want to reset in case you die. You should be able to melt through the Outlaw very quickly if you do not get a Shellos spawn in the floor and Totodile is allowed to play the game
-
If for some reason you still are not capable of doing 3 Beach Cave missions, you can still do 3 Drenched Bluff ones but that is not only very annoying but can also cost a lot of time
Sentry Duty #1:
- You want to get "Adequate" for a short cutscene and a free Protein
- You need to get the first 3 Pokemon right, lose 1 chance in Pkmn 4,5 and get Pkmn 6 wrong which just barely puts you under the threshold
- If you do a mistake in any of these steps you should get 2 Pkmn wrong instead which is a guarenteed "Adequate"
Mission Day #2 (2 Missions):
- Do 2 Beach Cave Missions (Check for more Beach Missions before heading to Waterfall Cave)
Waterfall Cave 9F: Medium-Large
-
Look for a Power Band (50% chance for a Band to be a Power Band)
-
Only enable Scratch on Totodile
-
Should you find a Power Band early it will be a huge boost in Power for Munchlax and make this dungeon and Apple Woods pretty free
-
In this game it is also not a bad idea to find a second Power Band for Totodile. He does not need it, but it is quite nice to have since you can freely choose between a Power Band and a Special Band for him in each dungeon without losing any time
-
Mission Day (1 Mission)
-
Sentry Duty #2 (get all Pkmn correct) Mission Day (0 Mission):
-
Use an Escape Orb if you have one, else either do a 2F Mission or just run through the whole Beach Cave without completing a Mission
Apple Woods 13F: Small-Medium:F1-2, F9-10 Medium-Large: F3-6, F11-12 Outer Square: F7 Crossroads: F8
-
Same strategy as in Waterfall Cave, but you really want to find a Power Band at this point
-
Mission Day (1 Mission)
-
Mission Day (1 Mission)
Craggy Coast 10F: Medium-Large
-
Only enable Scratch on Totodile (Gastrodon has Storm Drain here) and set Tactics to "Wait There"
-
Be careful to not let Bidoof near an enemy within 2 tiles since he loves to ruin your day with Growling at them, also in general he should not fight at all
-
Munchlax will learn Lick at some point, learn it over anything thats not Tackle
-
Item Manage before entering Mt. Horn, get all Reviver Seeds and Protein from Storage
Mt. Horn 15F:
- Give Munchlax the Protein
- only enable Water Gun on Totodile and equip Special Band
- Read the Text Messages, Parasect has Water Absorb so if Totodile does not OHKO something he may fight against one. In that case only enable Scratch and switch back after the fight
- You could also just only enable Scratch but I do not recommend it unless you have a 2nd Power Band
- Totodile should learn Bite in this dungeon, teach it over Rage & disable it
Foggy Forest 12F: Medium-Large
Steam Cave 8F & Upper Steam Cave 7F: Small-Medium
Groudon:
- Walk left
- Only enable Leer on Totodile, let him use it 3 times. Switch to Bite after that
- Throw a Sleep Seed on Groudon, spam Tackle, if he wakes up early throw another one
Mission Day: -Escape Orb
- Link Moves: Munchlax: Tackle + Lick; Totodile: Water Gun + Bite + Scratch
- Visit Kecleon Shop for a cutscene
Mission Day:
- Escape Orb
Amp Plains 11F: Small-Medium: F1-F9 Medium-Large: F9-10
- Pure Seeds can spawn from now on, keep checking every seed!
- Save them up for Deep Dusk
Far Amp Plains 10F: Small-Medium
Luxray:
-
A+B once
-
Throw a Stun Seed at Luxray
-
Spam Tackle + Lick
-
Once you are in Treasure Town, immediately go back to the Guild
Northern Desert 16F: Small: F1-4 Small-Medium: F5-15
Quicksand Cave 11F: Small-Medium
Quicksand Pit 11F: Small-Medium
Mesprit:
- Spam linked moves
- If it uses Detect, either use a Stun Seed or disable moves on Totodile and move diagonally until it wears off (of course enable the moves on Totodile again)
Crystal Cave 12F: Medium-Large
Crystal Crossing 14F: Small-Medium: F1,F4-5,F7-8,F11,F13 Medium-Large: F2-3,F6,F9-10,F12
Grovyle:
- DO NOT give up here, this only works in Explorers of Sky!
- Spam linked moves
- If you need extra safety, you can throw a Sleep Seed at him
2 more Filler Days:
- Escape Orb or beat Beach Cave
Chasm Cave 9F: Line: F1,F4,F7 Crossroads: F2-3,F5-6,F8
- Sadly no Luminious Orbs in this version so you have to play this dungeon (it is still possible to find Mobile Orbs!)
- Be very careful of Onix, it can use Sandstorm which would turn the current floor into hell
Dark Hill 16F: Small: F1-2,7F,F10,F12 Small-Medium: F3-5,F8-9,F13-15 Beetle: F6,F11
- A lot of Ghosts in this dungeon, do not let Totodile stand next to a wall
- If Totodile happens to fight a Ghost in a wall despite that advice, change Tactice to "Get Away" and switch it back to "Wait There" after a few turns
Sealed Ruin 9F: Small: F1,F5 Small-Medium: F2-4,F7-8 Beetle: F6
- Do not let Totodile stand next to a wall
Deep Sealed Ruin 7F: Small: F1,F5 Small-Medium: F2-4,F6
- Do not let Totodile stand next to a wall
Spiritomb:
- Move Right
- Throw a Stun Seed at Spiritomb
- Dash as far down as possible
- Unstun Spiritomb with a Sleep Seed
- keep holding A+B
Dusk Forest 9F: Small-Medium: F1-3 Medium-Large: F4-8
- Do not let Totodile stand next to a wall
Deep Dusk Forest 13F: Small-Medium: F1-5 Medium-Large: F6-12
- Use all your Pure Seeds on the large floors with Sandstorms!
- If you still have a few of them remaining after this dungeon, save them up for Hidden Lands Hail floors
Treeshroud Forest 21F: Small-Medium: F1-3,F6-8,F11-13,F16-18 Medium-Large: F4-5,F9-10,F14-15,F19-20
-
Waterfall Cave 2
-
Link moves for Munchlax: Screech + Tackle + Lick
-
You can check Green Kecleon here, they can offer Pure Seeds in addition to Reviver Seeds!
-
Go to Sharpedo Cliffs
-
Go to the Beach
Brine Cave 10F: Small-Medium: F1-F7 Medium-Large: F8-F9
Lower Brine Cave 6F: Medium-Large
Omastar & Kabutops:
- Spam linked moves
- Focus the Omastars first, they should be 0HKO
Hidden Land 16F: Small-Medium: F1-F8 Medium-Large: F9-F15
- Use any remaining Pure Seeds on Hail floors in this dungeon and Hidden Highlands
Hidden Highland 9F: Medium-Large
Dusknoir:
- Throw a Stun Seed at Dusknoir
- Defeat the Sableyes, prioritize the ones adjacent to Grovyle
- move up-right, swap places with Totodile, dash down, move left
- Throw a Sleep Seed at Dusknoir
- Hold A+B
Temporal Tower 14F: Small: F1-F2,F6-F7,F11-F12 Small-Medium: F3-F4,F8-F9,F13 Medium-Large: F5,F10
Temporal Spire 11F: Small: F3-F4, F8-F9 Small-Medium: F1,F5-F6,F10-F11 Medium-Large: F2,F7
Dialga:
- (eat a Quick Seed), move left
- Throw a Stun Seed at Dialga
- (if Dialga did not move, move Totodile one Tile up)
- Place Geo Pebbles above Totodile
- Move right, dash as far down as possible and throw a Blast Seed at Dialga
- Hold A+B and hope you survive this
If you want to play safe you can also do this fight onscreen, in that case place the Pebbles above you before unstunning Dialga with a Blast Seed
This strat works because Dialga has the IQ Skill "Item Master" which lets it use the item carries. We can easily abuse this by letting it pick up the Geo Pebbles we place so it has a high chance of using them instead of actual moves. That allows us to complete this fight offscreen reliably, saving ~30-40 seconds over the old strat.
- Timing ends on fade to black before Credits
