Subspace Emissary NG+ Route [2022]
Updated by Tech
This NG+ route benefits heavily off of exiting a level with one character and entering the next level with the same character for most of the route to cut down on load times. With the current characters used, a maximum of 3 bad loads can be achieved (from the secret character doors, the "fake bad load" is due to non-preloaded Kirby loading faster than preloaded Charizard).
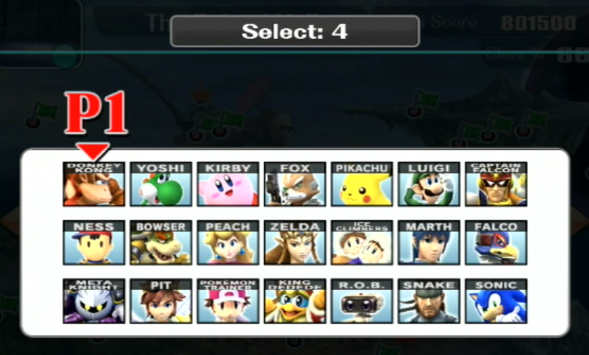
Before you attempt runs of this route, save these characters within Subspace I & Subspace II. The characters primarily used will be near the corners to cut down on selection time.
Braces { } include letters for optimal menuing from one level to another (U = Up, L = Left, R = Right, D = Down, ul = Up-Left, ur = Up-Right, dl = Down-Left, dr = Down-Right) as well as secret character door levels.
Parenthesis ( ) display which characters are used for that level and safe characters if desired.
Brackets [ ] resemble which levels will have a bad load and difficulty selection (levels without an indicated difficulty are played on Easy).
- Battleship Halberd Interior (Snake, MK)
- {RRRRRR} Subspace II (MK) [Very Hard]
- {DDLL} The Wilds I (MK) [Intense]
- {RRdr} The Glacial Peak (MK, +DDD safe + BL) [Intense]
- {U} The Subspace Bomb Factory II (MK, Falcon, R.O.B., Charizard)
- {DL} The Canyon (Kirby) [Fake BL]
- {LLdl} The Ruined Zoo (Kirby SD, Charizard, MK) [Very Hard]
- {LL} The Lake Shore (MK, Sonic)
- {ur} The Cave (Sonic)
- {ul} Sea of Clouds (Sonic)
- {DR} The Battlefield Fortress (Sonic, MK)
- {RRR} The Path To the Ruins (MK)
- {drUU} The Subspace Bomb Factory I (MK)
- {R} Subspace I (MK, Kirby) [Hard]
- {DDDL} The Wilds II (Kirby, MK)
- {LLU} The Jungle (MK, Fox) [Intense]
- {R} The Lake (Fox, Kirby)
- {dldldl} The Forest (Kirby) {Door}
- {ul} The Plain (MK) [Auto BL]
- {UU} Skyworld (MK)
- {RRR} Battleship Halberd Exterior (MK)
- {RD} The Ruins (MK, Pit SD, Kirby) [Intense] {Door}
- {RUU} The Research Facility I (Pikachu, MK) [Auto BL]
- {U} Outside the Ancient Ruins (MK, DK)
- {ul} Battleship Halberd Bridge (DK)
- {Ldl} Midair Stadium (DK)
- {RRRRDD} The Ruined Hall (DK)
- {RU} Entrance to Subspace (DK, MK)
- {L} The Swamp (MK, +Fox backup) [Very Hard] {Door}
- {Uur} The Research Facility II (Pikachu, MK, Charizard) [Auto BL]
- {RUR} The Great Maze/Tabuu (Charizard, MK)
Credit to MKCocoon for helping finalize the route.
Recent runs


Moderators