Hi, I'm making this guide in hopes of perhaps attracting more players to what I consider to be a fun and underrated category - The Survival Levels 1-10 Speedrun.
The Rules: The goal here is to get to Level 11 and die as fast as possible. You have to do this on a random sim, though I've never seen a weekly that's been particularly good for this category anyway.
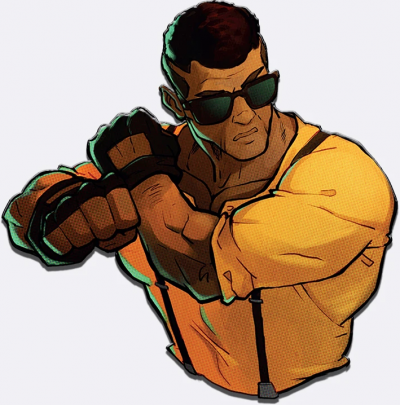
Recommended Character: Floyd. Floyd is by far the best character for this category, having access to a ranged special as well as a special that gives him fantastic movement options. I think Max may also be viable but I've found this toolset isn't quite as good.
Recommended Moveset:
Blitz - Thunder Twins: You don't use the blitz all that often in this category, but TT is better for a few enemies types and really just deals damage faster than Gatling Punches
Defense Special - Thunder Trap: This special is useful for stunning enemies in place for a couple seconds, including grounded ones, giving you a chance to quickly finish them off. I've seen Thunder Sphere used as well by others and while it does more damage, I value the utility of Thunder Trap more.
Offensive Special - Rakushin Cannon: Extremely valuable for killing low health mobs, able to kill many things very quickly and from a safe range.
Air Special - Power Slide: An excellent movement option on a rather slow character. If you need to grab something quickly, Power Slide to it! It can also hit enemies OTG which can allow you to quickly finish off an enemy, even from fairly far away.
Star Move - Rakushin Beam: A really strong star move that can hit the entire screen if aimed correctly. Very useful against both bosses and trash mobs.
Notes: This category is VERY rng heavy. Enemies, perks, bosses, levels, pick ups, hazards, spawn locations, and even the level's length are all random. You will be resetting a lot and it can take as long as 30 minutes (possibly longer, but that's been my longest drought) to get a run that gets past level 0. Learning to adapt to all kinds of scenarios is a must to get a really good time.
In general you ALWAYS want to get Glass Cannon on Level 0 and a gold weapon prior to Level 4, though there are exceptions such as a big sword or a swordfish appearing on a prior stage. Glass Cannon + Gold Naginata is king though and there's no better damage dealing combo in this category.
That said, let's look at the perks! For starters I made a tier list for simplicity:
S Tier: Glass Cannon, Gold Naginata, Sharpen Tool
A Tier: Bloodthirst, Ground Level, Gold Pipe, Electric Weapon, Three Stars, Speed Up
B Tier: Gold Boomerang, Gold Knife, Toxic Weapon, Damage Up, Full of Yourself, Special Cost Reduction, Toxic Special, Hey Buddy
C Tier: Tactical Support, Defense Up, Last Hurrah, Survival Instinct, Fire Weapon, Fire Special, Electric Special
D Tier (Useless): All elemental Heavies, all elemental Blitzes, Extra Jump
F Tier (These can kill your run): Heat of the Battle, Elemental Star, Old School Rules
As for explanations of why they're tiered the way they are:
Glass Cannon: This is your main source of damage and THE most important perk for the speedrun. You want this to be your first perk because nothing else is even close to as fast. Don't forget to be mindful that you take an extra 60% damage from all sources, though this will rarely be a problem in this category.
Gold Naginata: This weapon has a lot of range and a lot of damage, making it your fastest way of dealing damage. Pairs wonderfully with Glass Cannon, killing even bosses in 2 or 3 swings when you have both.
Sharpen Tool: You want to have weapons for as long as possible. A perk that gives them more durability is obviously very useful!
Bloodthirst: Bloodthirst, while not a necessity, is valuable because you can heal while dealing damage. Stopping to pick up food in the middle of combat wastes time. The extra points from food pick ups could also net you an extra star throughout the run.
Ground Level: Speed, Damage, and Defense all from a single perk is very nice.
Gold Pipe: This is basically a discount Gold Naginata. It does slightly less damage, has less range, and has less durability but still does the job very well.
Electric Weapon: This lets you deal a lot of extra damage when hitting multiple targets, and it stuns them as well.
Three Stars: Generally I find stars to be slower than using a weapon, but having extra stars during the run is useful for annoying waves/bosses or if you don't currently have a weapon.
Speed Up: Being able to walk faster in a speedrun is useful!
Gold Boomerang: This actually has really nice damage range and durability, but is a bit difficult to use. Some enemies can also catch or break it, making it largely useless against them. Still worth taking if you have no weapon.
Gold Knife: Definitely the worst weapon perk, but it does still deal nice damage and can kill bosses quickly. Like the boomerang, worth taking if you have nothing else.
Toxic Weapon: This puts a little bit of extra damage on your weapon swings. While only a handful of enemies can survive glass cannon + golden weapon, this perk ensures you get more kills and don't have to chase enemies down.
Damage Up: This helps you net some kills you wouldn't get otherwise.
Full of Yourself: Like Damage Up, this just helps with getting more one hit kills. If you're using a weapon, you'll be at full hp most of the time so this perk is frequently active.
Special Cost Reduction: Lets you use your cannon and power slide more often. Special usage isn't super important in this category but it does help.
Toxic Special: Like toxic weapon, this helps you net a few extra kills. Most useful when you're using your cannon on higher hp enemies like Altet and Signals.
Hey Buddy: This perk can help and hurt, but I find it helps more than hurts. The value in the Buddy is that they can aggro enemies and bring them all to the same location so you can kill them all quickly. Donovan and Margaret also have decent killing power on their own, the former with a weapon and the latter with grenades. The downside to this is that may aggro enemies away from you, thus making them harder to kill. In my experience, this is a pretty easily avoided scenario if you're mindful of your surroundings though.
Tactical Support: Deals a nice chunk of extra damage when you use your star, which is usually only helpful against bosses. Tends to miss as well.
Defense Up: It's rare to actually die in this category, at least from anything besides draining all your health via special usage. That said, it's still nice to have a little extra security from death.
Last Hurrah: Extra damage you only get sometimes. When this helps it's kind of on accident and you can't really plan for it, but it's nice when it does.
Survival Instinct: Basically just a worse Defense Up that is only active sometimes. If you're taking this perk you're probably getting some bad perks.
Fire Weapon: This lets you deal a little big of extra damage as well as stun enemies with superarmor, which can occasionally be helpful. However, be weary of this perk launching an enemy away from you due to them bouncing off the fire.
Fire Special: See Fire Weapon, but for specials!
Electric Special: I'm debating still whether this perk is good or bad and the longer I play I lean bad. Like Electric Weapon, this helps you deal a lot of extra damage when you're hitting multiple targets. It also helps with juggling bosses, though this category has a lot less of that than the others. However, this perk prevents you from launching enemies off the boxing stage with your cannon, which is losing potential big time saves. Use your judgement on this one and maybe try both.
Useless stuff: These perks are useless because you are almost never using blitzes or your heavies, thus perks that buff these attacks do nothing for you. I suppose if you must take something, take the heavies over the blitzes and take electric -> toxic -> fire in order of importance. Extra Jump is useless simply because there's no scenario I can think of where this perks aids you.
Heat of the Battle: While this perk can be useful in other categories, the enemies in the 1-10 speedrun don't have enough health to justify picking this up. Glass Cannon is the damage dealing perk to pick. This perk will only slow you down.
Elemental Star: This totally neuters your star and gives you nothing in return. Don't take it.
Old School Rules: Probably the least offensive of the bottom 3 perks, but this perk is bad because green health is better in a 1-10 speedrun. This is because punching an enemy or box to recover health is much faster than wandering around looking for a food item, which can waste a lot of time. Additionally, this can make it harder for you to reduce your hp to 1 at the end of a run so an enemy can kill you, and I've had runs where I lost like 15-20 seconds trying to die and not being able to due to this perk. Yeah, it can work when paired with Bloodthirst but you're unlikely to get both in this category and it's really just not worth the hassle in general.
Next, some general tips. I'll be writing this with the assumption that we have Glass Cannon from Level 0.
Don't waste time thinking about a perk: Very quickly take your perk. Get used to spotting important perks so you can grab them as soon as possible. It's okay to pick a slightly worse perk if it's closer. Anything below A tier is probably not worth the extra 1-2 seconds it'll take to walk over to it.
Walk to the level gate before it spawns: By ready to enter instantly. Be mindful that the gate doesn't always spawn at the top and in the middle, as some boxing stage and retro stages have it spawn elsewhere. It helps to memorize these levels and where the gates spawn. Also, clear any boxes that might spawn near the level gate. They can block your way and cost you valuable seconds.
Don't waste time with pick-ups: You can pick up stuff when there's no enemies on your screen, but unless you're about to die I wouldn't pick up anything in the middle of a fight or if the level is over. The best time to pick up stuff is between waves and when the level just started.
Use hazards to your advantage: The obvious one here is throwing enemies off the stage on boxing levels, but things like explosive barrels and wrecking balls can help net you faster kills if you use them smartly. Speaking of wrecking balls, Power Slide can travel through them pretty safely. Some boxing stage layouts are really nasty so getting comfortable with this is high valuable.
When preparing to die, drain your hp on Level 11: I've seen players drain their health on Level 10 and that wastes time. While waiting to be vulnerable on Level 11, there's tons of time to drain your health. Do it there.
On levels 1-3, every enemy (except on retro stages!) except for Big Ben and Barney die to a single cannon shot. That's Galsia, Donovan, Dylan, Y. Signal, Diamond, Ferrocio, and Murphy. For Barney and Big Ben, a single gold weapon (except knife) attack or a combo string + Thunder Twins will kill them. This makes non-retro 1-3 fairly straightforward no matter what spawns you get.
Boss tips: In general, you want to kill them asap with 2 or 3 golden naginata swings before they can power up, but all the bosses have varied health and behavior so it's not always quite that simple. Some bosses are absolutely better to get than others and below I'll put them in tiers as well based on speed and consistency when it comes to kill them:
S Tier: Abadede (SOR2), Abadede (SOR1), Nora, Max, Bongo, DJ K Washi, Barbon (retro), R. Bear
A Tier: Diva, Beyo, Riha, Barbon, Zamza, Shiva (retro), Souther
B Tier: Mr. X (SOR2), Cherry, Adam, Axel, Blaze, Floyd, Mr. X (SOR1)
C Tier: Mr. Y, Shiva, Yamato
D Tier: Commissioner, Mona, Ms. Y, Antonio
F Tier: Estel
S Tier: These are bosses that don't power up (minus DJ and Max) and none of their attacks are likely to hit you before they're dead. DJ also has very low hp so he's likely to die in two swings rather than 3, even if you're using a golden pipe. Just don't mess up quick killing him though, his power up is very long. Max usually charges up a move with super armor for more than enough time to kill him before he gets off a single attack. The danger of him powering up is low as well, and even if he does, it's fast. Just make sure you dodge his dropkick because he'll open with that if you're not close to him.
A Tier: Bosses that are non-threatening most of the time, but are either fast or have a chance of wasting your time with a power up. Still nice to get but less free.
B Tier: The Mr Xs can snipe you from across the level on some situations, costing you valuable time. The doppelgangers are here because they're overpowered and can superarmor through your attacks and waste a lot of time. Knives and Boomerangs are also ineffective against them since they can catch them, giving you less options for quick kills.
C Tier: These bosses are very punishing if you fail the quick kill. Mr. Y is annoying and evasive with the ability to snipe you across the map, Shiva's clones waste tons of times, Yamato can clone himself which wastes lots of time while being generally evasive. It's certainly possible to quick kill these bosses, but this is the first group that can start causing resets consistently.
D Tier: Commissioner's power up gives him full iframes for his first attack (except for fire and your star move), Mona is very dodgey and instantly spawns a second target that can waste a ton of time. Ms. Y has one of the biggest hp pools out of all the bosses and likes to use a hop that has full iframes. Antonio has the same problem as the doppelgangers but also has rocket shoes. These bosses are often reset on sight.
F Tier: By far the worst boss to get. Can power-up THREE times with the first one being extremely slow. She also lands on her feet after being damaged so stopping her from powering up is extremely difficult. Huge time waster. Horrible boss to get no matter the circumstances.
While discussing bosses, I figured I'd bring up some notable enemies you may encounter as well.
Zack and Goldie: Only notable here because they're enemies you can't one shot with the cannon. You CAN kill them with cannon + wallbounce though, or if you get a damage up/toxic special.
Raven and Fog: Other common retro enemies you can't kill with the cannon. You're best off using jab strings or a weapon for them. Raven can also block, but usually doesn't.
Kusanagi: An awful retro enemy you can get on every stage. Very dodgey, has a ranged attack and a fast punch. And he can survive some gold weapon swings. Try to kill him as he spawns if possible or he becomes a menace quickly.
Tiger: Can block, which obviously wastes time. But is mainly notable here for his high hp pool. Even a gold naginata can't one shot him.
Stiletto: Only non-retro enemies prior to level 9 that can tank a gold naginata shot. However, her hp is low enough that a power slide finishes her off.
Goro and Dokuja: Can parry your weapon swings so try to stay out of their parry range. Dokuja in particular is a huge time waster if he hits you.
Kickboxers: Can block, wasting your time. If they do, grab them. Floyd's grabs can usually one shot them.
Lastly, tips for the Level 0 enemies BEFORE you have Glass Cannon:
Galsia: The cannon still one shots them.
Dylan: You have two options here: A cannon + wallbounce will kill them but that isn't guaranteed. If they're not close enough to the wall through you can grab them and head smash them into another Dylan, which one shots them both. Dylans are a bit tricky though and will sometimes cause resets if they don't cooperate.
Ferrocio: The best way to kill them fast is the grab into head smash. Ferrocios usually go right towards you so this is easier to do than with Dylans. You can also kill them with jab combo strings if they cooperate, though this is slightly slower.
Y. Signals: The only way to kill them quickly is by using your star. Powerslide left or right and use it and hope it hits them all. While this is slightly slower than getting a Galsia wave, this is faster and more consistent than Dylans and Ferrocios. If your star fails to kill them all, just reset. These guys take way too long to kill otherwise.
And I think that's about it! I know this is a niche category, but if this guide convinces even one person to give this category a try, then it was worth it.
